You might wonder if traditional cymbal-making methods still hold relevance in today’s automated world. They do, and you’ll find that crafting cymbals remains a precise blend of metallurgical science and artisanal skill. As you explore this ancient craft, you’ll discover that creating these musical instruments demands an intimate understanding of bronze alloys, specialized tools, and time-tested techniques. The journey from molten metal to finished instrument reveals secrets that modern manufacturing can’t replicate.
Key Takeaways
Start with proper bronze alloy selection, typically using B20 (80% copper, 20% tin) for professional cymbals or B8 for entry-level.
Cast molten bronze at 2100°F in disc-shaped molds, ensuring even distribution and proper cooling for structural integrity.
Shape the cymbal blank using hydraulic pressing, followed by systematic hammering patterns from center outward for tension control.
Create tonal grooves through precision lathing, then polish and heat-treat the cymbal to achieve desired acoustic properties.
Test sound quality by analyzing fundamental tones and overtones, making adjustments through additional lathing or hammering as needed.
Understanding Bronze Alloys and Raw Materials
The art of cymbal-making begins with selecting the ideal bronze alloy composition. You’ll need to work with a specific blend of copper and tin, typically ranging from 80/20 to 88/12 ratios. This bronze composition directly influences the cymbal’s sonic characteristics and structural integrity.
For professional-grade cymbals, you’ll want to focus on B20 bronze, which contains 80% copper and 20% tin. This alloy provides maximum hardness and acoustic properties while maintaining workability during the forging process. The alloy properties are essential – higher tin content creates brighter tones, while more copper produces warmer sounds.
You must guarantee your raw materials are pure and free from impurities. Even small contaminations can compromise the final product’s sound quality. Modern cymbal manufacturers often add trace elements like silver or phosphorus to enhance specific tonal characteristics, but these additions require precise control and extensive metallurgical knowledge.
Essential Tools and Equipment for Cymbal Making
You’ll need several core pieces of machinery to begin cymbal making, including a casting furnace, hydraulic press, and precision lathe equipped with specialized cutting tools for shaping and lathing the bronze. To maintain quality control, you’ll want proper metal storage facilities with temperature and humidity monitoring, along with precision scales and metallurgical testing equipment to verify your bronze alloy compositions. Essential safety equipment includes heat-resistant foundry gear, respirators rated for metal particles, face shields, and heavy-duty gloves that can withstand both extreme temperatures and sharp metal edges.
Basic Equipment and Machinery
Manufacturing professional-grade cymbals requires specialized equipment designed to handle the unique demands of bronze alloy forming. You’ll need a high-temperature foundry furnace capable of reaching 2000°F for melting and casting the bronze. A hydraulic press with variable pressure settings is essential for shaping the blank discs into cymbal profiles. The process also requires a metal lathe for trimming edges and a specialized hammering station with various pneumatic hammers.
For cymbal manufacturing, you’ll also need precision measuring tools, including micrometers and thickness gauges. A computerized cutting system helps maintain consistency when sizing blanks. Don’t forget the importance of proper ventilation equipment and dust collection systems. The final stages demand a dedicated polishing station with various buffing wheels and compounds for achieving the desired finish.
Metal Selection and Storage
When selecting metals for cymbal manufacturing, B20 bronze alloy (80% copper, 20% tin) remains the professional industry standard due to its superior acoustic properties and durability. You’ll also encounter B8 bronze (92% copper, 8% tin) for entry-level cymbals, though it produces less complex tones.
| Metal Type | Storage Requirements |
|---|---|
| B20 Bronze | Climate-controlled, <40% humidity |
| B8 Bronze | Dry environment, sealed containers |
| Bell Bronze | Temperature stable room |
| NS12 Alloy | Moisture-free cabinets |
Store your metal sheets vertically to prevent warping and guarantee proper air circulation. Keep them away from chemical fumes and industrial solvents that can tarnish or corrode the surface. You’ll need to maintain consistent temperature and humidity levels to prevent metal fatigue and oxidation during the manufacturing process.
Safety Gear Requirements
Because cymbal manufacturing involves high temperatures and powerful machinery, proper safety equipment is absolutely essential. You’ll need a complete set of personal protective gear before beginning any metalworking processes. Your safety equipment must meet industrial standards and be regularly inspected for wear or damage.
Required safety gear includes:
- Heat-resistant foundry gloves rated for 2000°F, featuring reinforced palms and extended forearm protection for handling hot metal
- Full-face shield with side protection and ANSI Z87.1-rated safety glasses underneath for protection against metal sparks and debris
- Fire-resistant clothing, including a leather apron, steel-toed boots, and tight-woven cotton garments that won’t melt or catch fire
Never compromise on safety equipment quality – it’s your primary defense against serious workplace injuries during cymbal production.
Casting and Shaping the Basic Form
The cymbal-casting process starts with a specialized bronze alloy containing approximately 80% copper and 20% tin, heated to 2100°F (1150°C) in a temperature-controlled furnace. You’ll pour this molten metal into preheated disc-shaped molds, following techniques that date back to ancient Turkish and Chinese cymbal types. The molds must be perfectly level to guarantee even distribution of the alloy.
Once cooled, you’ll need to remove the cast blank and begin the vital cross-rolling process. This involves passing the metal through heated rollers multiple times, reducing thickness while increasing density. The technique, perfected through centuries of craftsmanship, creates the molecular structure necessary for ideal sound production.
Next, you’ll press the blank into a rough cymbal shape using a hydraulic press. This initial shaping establishes the basic profile – whether it’s a flat ride, curved crash, or bell-heavy design – while maintaining the metal’s crystalline structure developed during rolling.
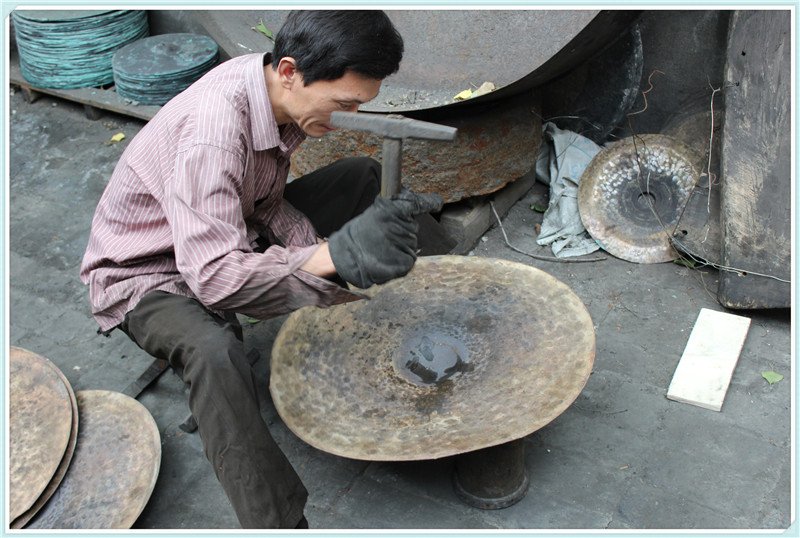
Mastering Hammering Techniques and Patterns
You’ll need to master three essential hammering techniques – the flat strike, the groove strike, and the edge strike – to achieve proper cymbal shaping and sound characteristics. Begin by mapping out concentric circles on your blank’s surface to establish symmetrical hammering patterns, using precise measurements to maintain even spacing between strike points. As you progress to multi-zone hammering, you’ll combine these techniques across distinct areas of the cymbal, varying the strike intensity and density to create specific tonal properties in each zone.
Basic Hammering Strike Methods
Mastering cymbal hammering techniques requires understanding three fundamental strike methods: radial, circular, and random patterns. When striking the metal, you’ll need to adapt different striking techniques depending on your desired impact sound effects and tonal characteristics.
- Strike vertically with consistent force using a 2-pound hammer at 90 degrees for radial patterns, creating concentrated stress points
- Employ smooth, fluid motions in concentric circles when performing circular strikes, maintaining even spacing of 1/4 inch between impacts
- Execute random strikes strategically across the cymbal’s surface, varying the hammer weight between 1-3 pounds to achieve complex overtones
These basic hammering methods form the foundation for more advanced techniques, allowing you to manipulate the metal’s molecular structure and shape its acoustic properties effectively.
Creating Symmetrical Pattern Layouts
Building upon basic strike methods, symmetrical pattern layouts demand precise planning and methodical execution to achieve balanced acoustic resonance. You’ll need to divide your cymbal’s surface into equal sections, typically starting with four quadrants before further subdivisions. Using a compass and protractor, mark these sections lightly with a non-permanent marker.
Create your pattern template by plotting symmetrical shapes that radiate from the center bell. You’ll want to maintain consistent spacing between strike points to guarantee pattern repetition across all sections. Start hammering from the center outward, alternating between quadrants to maintain even tension distribution. This approach prevents warping and guarantees uniform acoustic properties throughout the cymbal. Remember to verify your measurements frequently, as minor deviations can compound into noticeable tonal imbalances.
Advanced Multi-Zone Hammering
Three distinct hammering zones form the foundation of advanced cymbal crafting: the bell zone, bow zone, and edge zone. When applying advanced techniques to multi-zone design, you’ll need to carefully control hammer depth and spacing to achieve ideal sound characteristics. Start from the bell and work outward, using progressively lighter strikes as you move toward the edge.
- Bell Zone: Apply deep, concentrated hammer strikes in a tight spiral pattern, creating structural rigidity and focusing high frequencies.
- Bow Zone: Implement medium-depth strikes in overlapping rows, establishing the cymbal’s primary voice and sustain.
- Edge Zone: Use light, carefully spaced strikes to enhance spread and wash while maintaining proper flex.
This multi-zone approach requires precise pressure control and consistent arm movement to achieve professional-grade tonal separation between zones.
The Art of Lathing and Surface Treatment
Lathing transforms a raw cymbal blank into a refined musical instrument through precise surface modification. You’ll need a specialized cymbal lathe designed with variable speed control and precision cutting tools to achieve consistent groove patterns. Start with coarse cuts to establish the basic tonal foundation, then progress to finer tools for detailed surface refinement.
Position your cutting tool at a precise angle to create grooves that spiral from the cymbal’s center to its edge. The spacing and depth of these grooves greatly impact the cymbal’s fundamental pitch and overtones. You’ll want to maintain steady pressure and consistent feed rates throughout the process.
Surface polishing follows lathing, requiring progressive grits to achieve your desired finish. Whether you’re aiming for a brilliant shine or a natural satin texture, each polishing stage affects both aesthetics and acoustic properties. Remember that different cymbal types require specific lathing patterns – rides need deeper grooves than crashes for ideal sound projection.
Tempering and Heat Treatment Methods
The proper heat treatment process directly influences a cymbal’s final acoustic characteristics after lathing. You’ll need to carefully control temperature and timing to achieve the best thermal resistance and ideal molecular structure. The bronze alloy’s microstructure analysis reveals that precise tempering between 600-750°F creates the perfect balance of hardness and flexibility.
- Heat the cymbal evenly in a temperature-controlled furnace until it reaches a uniform cherry-red color, typically around 1,400°F
- Quench the heated cymbal in specialized oil at a controlled rate to prevent warping and maintain dimensional stability
- Perform secondary tempering cycles at lower temperatures to relieve internal stresses and fine-tune acoustic properties
Testing and Fine-Tuning Your Cymbal’s Sound
Sound testing marks a critical phase in cymbal making, where careful evaluation of acoustic properties determines if your heat treatment and lathing achieved the desired tonal characteristics. Begin by mounting your cymbal on a proper stand and striking it at various points to assess fundamental tones, overtones, and sustain patterns.
Apply specific tuning techniques based on your sound analysis findings. If you detect unwanted frequencies, carefully adjust the lathing depth in problematic areas. You’ll need to test strike points at different distances from the bell, noting changes in pitch and resonance. Document your findings using frequency analysis software to create a detailed acoustic profile.
For fine-tuning, focus on edge thickness consistency and bell-to-bow shifts. Make minor adjustments to hammer patterns if needed, but remember that each strike permanently alters the metal’s crystalline structure. Test the cymbal’s response at various playing dynamics to guarantee consistent performance across all volume levels.
Conclusion
As you’ve mastered these intricate cymbal-making techniques, you’ll find that the true art lies in balancing metallurgical precision with musical intuition. Your journey doesn’t end here – each cymbal you create will teach you something new about bronze behavior, hammering patterns, and tonal development. Keep experimenting with alloy compositions and tempering methods; there’s always another sonic frontier waiting to be discovered in this ancient craft.